WorkMan HVS - Installation for Avaya IP Office PBX (tech-guide)
Contents
About
This guide is aimed towards the technician that will configure an IP Office to work with WorkMan HVS. Since we typically install the HVS-part this is what you need on the IP Office.
Please review the complete WorkMan_HVS_-_Installation_checklist instead.
Short description of various call flows
- Registering a cleaningcode
- Dials shortcode on phone
- Routes call to SIP Trunk
- HVS SIP Service recieves call
- HVS answers call and IVR prompt is played
- Registering a wakeup
- TBA
- Triggering a wakeup by HVS
- HVS SIP service initiates a call
- Call enters the SIP trunk
- IP Office tries to match the called extension with SIP-number or extension (* in SIP Trunk)
- Incoming call route is hit
- Ring on extension
Install licenses
- Licenses for 3rd part TAPI
- License for SIP trunk as well as VCM
- Other licenses on PBX?
SIP-trunk
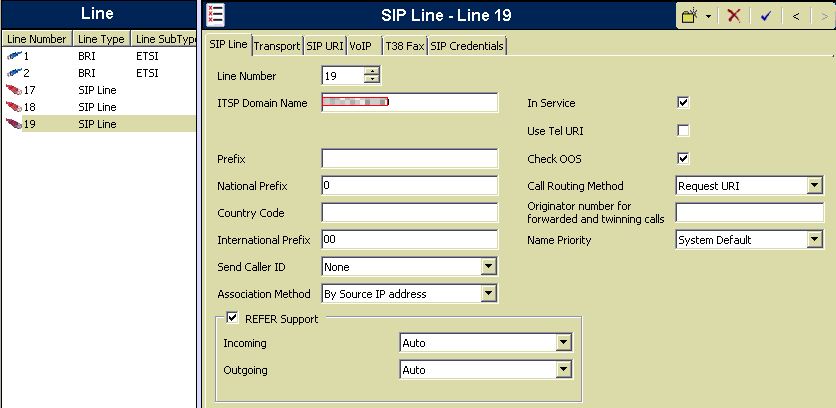
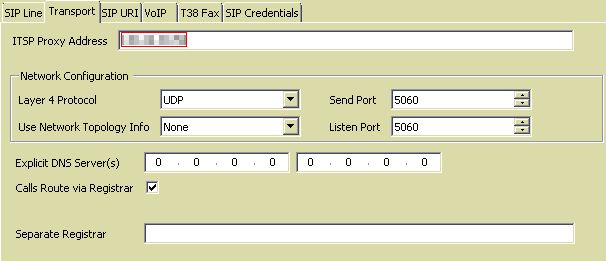
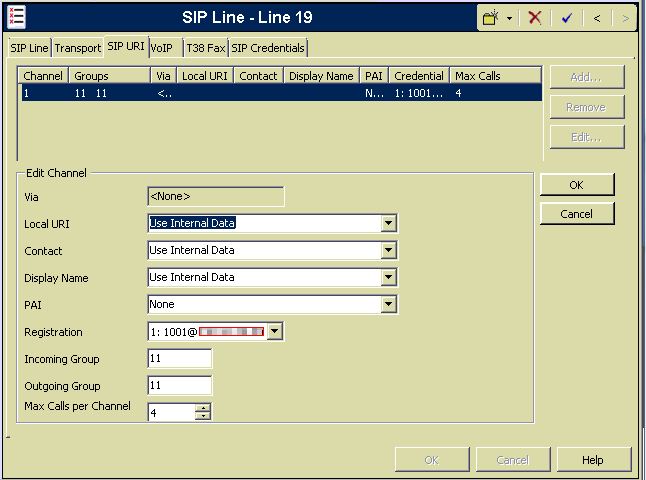
Create a new SIP Trunk and set the IP to the server where WorkMan HVS Voice resides.
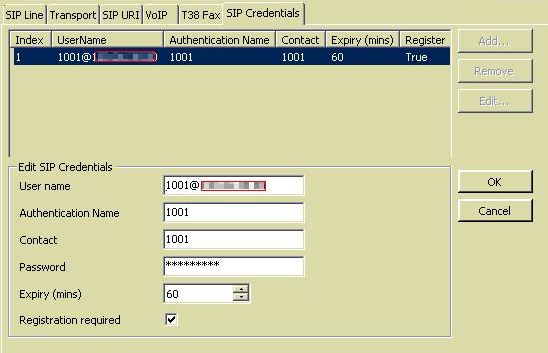
The typical user is 1001@<ip-address of HVS-server>
Verify that it's working
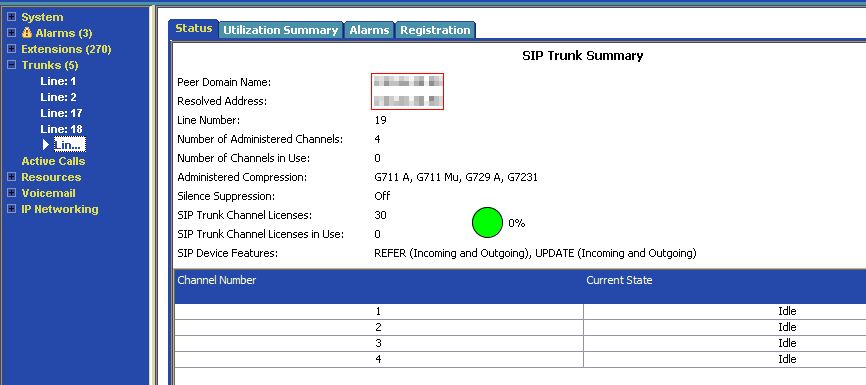
Start Avaya IP Office System Status tool and navigate to the correct trunk. See that the channels are idle.
TAPIWave
IMPORTANT! The TAPI Wave version of HVS is obsolete and you should upgrade to SIP-version.
Configurationservice
Permission
Configure userrights
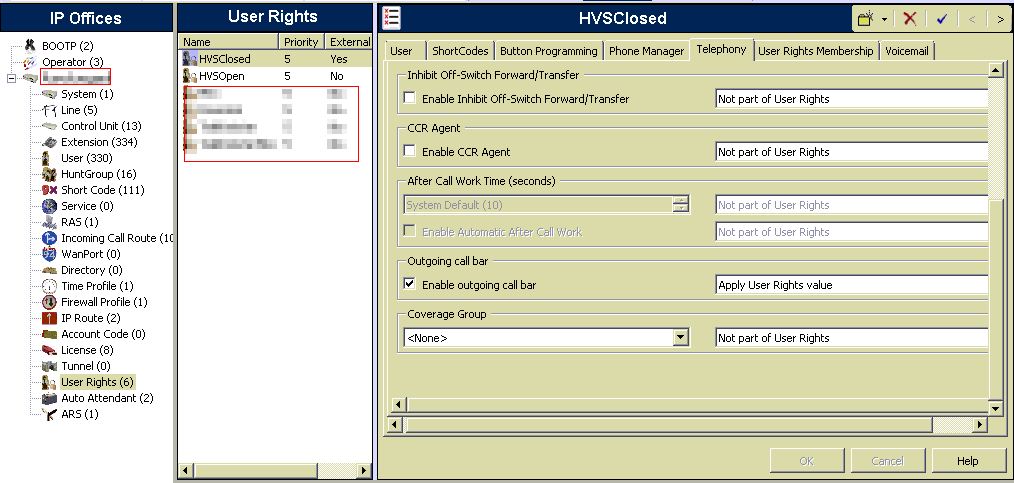
You must create 2 userrights where outgoing call barred is set to true and false. HVSOpen is where outgoing call barred is set to false e.g. outgoing calls can be made. HVSClosed is where outgoing call barred is checked (true) e.g. outgoing calls can't be made.
You navigate to the value through Telephony - Supervisor Settings
